


Resin Driveway Ideas That Work in Real Front Gardens

Updated: 2 days ago
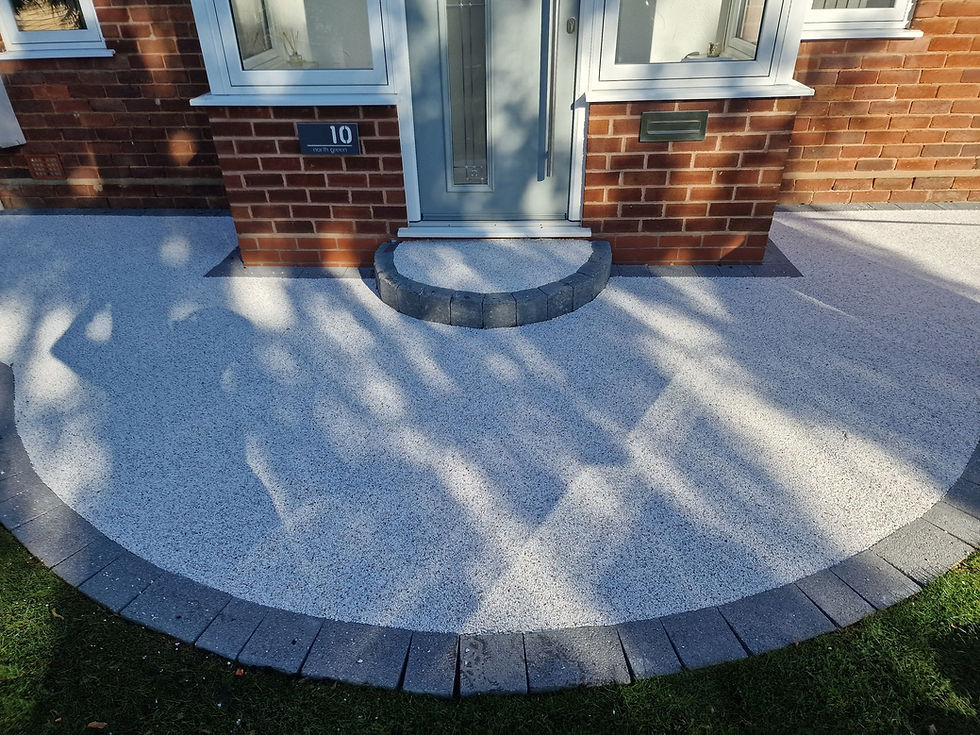
The resin driveway ideas that look best a few years on are simple ones: a single well-chosen blend, framed by a contrasting border, with the path, steps or patio carried through in the same finish. The resin drives we lay are poured and trowelled rather than laid in units, so curves, bands and shapes cost far less effort than they would in slabs. The design limits come from the edges, not the surface.
Below are the ideas we see working on real drives, and the practical detail behind each.
1. A contrasting border around the drive
This is the most popular resin driveway design for a reason. Resin is trowelled to a fixed depth (around 18mm on a driveway), so it has to finish against something solid. Making that edge a feature, rather than hiding it, gives the drive a clean outline and stops the resin edge chipping.
Popular border materials are tumbled concrete blocks, granite setts and smooth kerbs. Darker borders around lighter resin are the classic look. Our resin bound driveway in Claregate has a charcoal tumbled-block border; the Warstones driveway and path pairs Daltex White Flint with black granite block borders.
2. A border in a second resin blend
Instead of blocks, the border itself can be resin in a different colour, separated from the main field by a thin aluminium strip. It gives a softer, more modern look than blocks. Two tones can also share the edge: the sienna driveway in Pendeford is finished with tumbled block edging and a heather-toned border.
The key is contrast you can live with. Two strong colours side by side can look busy on a small frontage; tone-on-tone (a border a shade or two darker) rarely does.
3. Bands and strips across the drive
Bands of block or a second blend running across the drive break up a long, narrow driveway and make it feel wider. They also give the installer a natural place to stop one section and start the next, so the join sits against a band rather than in the middle of open resin.
4. One blend from the gate to the back door
A resin drive that carries on as the front path, then down the side of the house to a patio, makes the whole property look planned. Matching the driveway and patio was the approach on our Wombourne job, in a golden aggregate with block-paved borders, tying the front and rear of the property together. Laying them in one visit can also cost less than doing them separately, because the setup and team are shared.
5. Resin steps that match the drive
Steps are where many driveways end up with a mismatch: a smart resin drive and concrete steps at the front door. Resin bound can be laid on step treads with a nosing to hold and protect the edge, and the risers finished to suit. It is a detailed job and not every step can take it, so our post on resin steps covers what the step needs to be first.
6. Planting pockets and soft edges
Resin is permeable on the right base, so it can run close to beds and borders without sending water into them in sheets. Leaving planting pockets along the boundary, or a strip of lawn, softens a big hard surface. In a front garden it also matters for planning: the government's guidance says a new or replaced driveway of any size needs no permission if it is permeable or drains to a lawn or border. A permeable resin bound driveway on a permeable base meets that on its own.
7. House numbers, shapes and simple motifs
Separate blends can be laid inside metal-strip outlines to form a circle, a compass point or a house number. It is possible, but it is slow, fiddly work, and complex patterns and multiple colours push the price up. Keep it simple and in proportion: one motif at the entrance, not several across the drive.
8. Lighting and edges designed together
Low-level lights set into a block border, rather than into the resin itself, keep the cable runs and fittings in the edging where they can be reached later. Plan them before the base goes in.
Resin driveway edging: which option?
Edging is the detail that holds a resin design together. Pavingexpert lists the standard options as existing kerbs or edgings, aluminium edging strips, or small edging strips where there is no formal edge. In practice:

Aluminium or steel strip: almost invisible, ideal between two resin blends and against lawns.
Block or brick border: robust, adds colour, takes a car tyre on the edge.
Kerbs: best where the drive meets a pavement, a raised bed or a level change.
Granite setts: a premium, traditional look on period houses.
Whatever the edge, it has to be fixed before the resin goes down and set to the finished height, because resin cannot be trowelled up to a soft or moving edge.
Ideas to avoid
Some designs look good on day one and poorly by year three:
Resin bonded for a "resin look" on the cheap. Loose stone scattered on a resin coat sheds over time and is usually not permeable. We lay resin bound only.
Very light blends on a steep drive. Tyre marks and dirt show most where cars brake and turn, which on a slope is everywhere.
Overlaying old block paving to save money. The blocks move individually and the joints tend to crack through.
Non-UV resin on a sunny drive. It yellows, unevenly, and the pattern of a parked car can show through.
Good design is only half of it, and the spec decides the rest, as our guide to are resin driveways any good explains. A drive laid well on a proper base can last up to 25 years; our post on how long a resin driveway lasts explains what shortens that.
If you would like to see these ideas on real driveways around Wolverhampton, Pete and the team can talk through layouts and blends at a free site visit. If a concrete look appeals more, exposed aggregate driveways give a similar stone texture set into concrete.


Comments